Here I’ll be documenting my grow of the cannabis strain called Blue Dream. It is one of the most popular strains of all time and it is considered one of the hardier/easier sativas to grow, so that sounded perfect for my first attempt at a hydroponic Deep Water Culture (DWC) grow method!

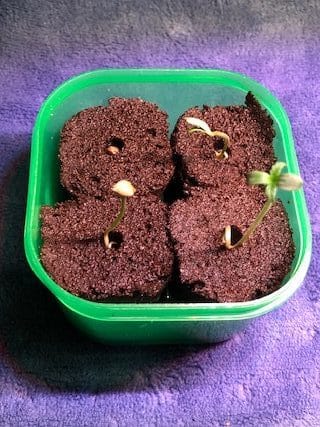
I started with 4 feminized seeds and they all sprouted! Here are my little baby Blue Dream seedlings:
Originally, I started this grow with 4 “bubbler” buckets but that quickly grew tiresome and not to mention this system was not supplying the plants with enough dissolved oxygen. I also quickly realized what a pain it would be to do water changes with the bubbler bucket setup.
The Grow Setup
So I made a switch a few weeks into the grow. You can see the bubbler buckets below.
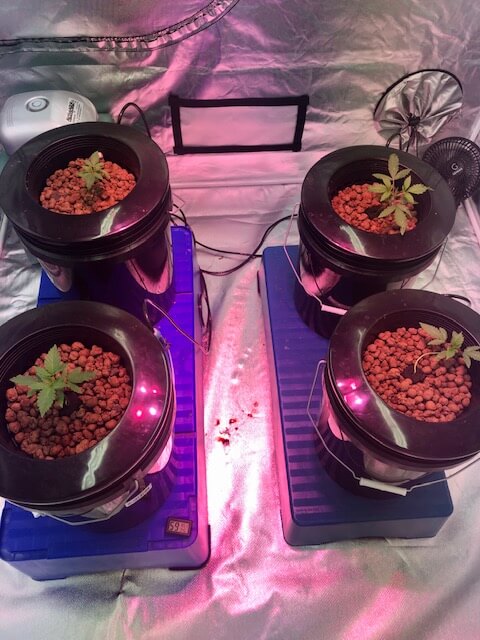
I am now using 4 totes (4 plants) with a main reservoir and pump for this grow and I also plan on quad-lining these plants to help manage growth while increasing yield at the same time!
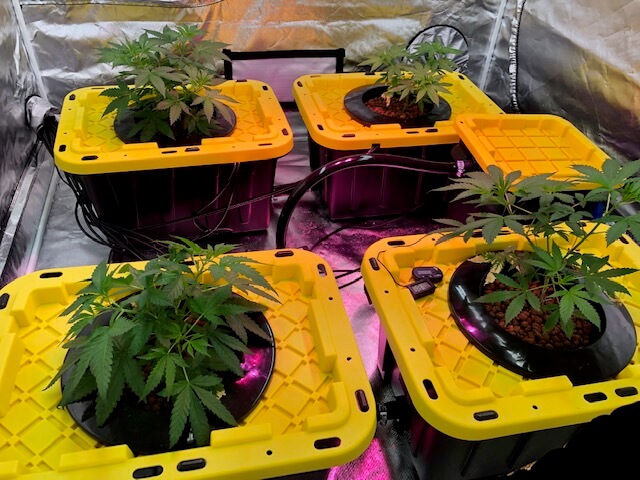
This is a closed loop type system with the main pump being in the middle of the system. The pump moves water throughout the totes constantly.
I am using a rather powerful and noisy air pump with 2 large air stones in each tote. The main reservoir also has 2 air stones.
I had a minor issue about 5 weeks into the grow and had to swap out some cheap air stones that I started with for this grow log. So now I’m using some pretty big air stones (x2) in each tote.
Blue Dream Nutrients
For nutrients I’m using the General Hydroponics Flora Series. These nutrients get good reviews, easy to dose and are easy to get (on Amazon) for me. They have dosing charts on their website here: General Hyrdoponics Feed Charts – I’m using the medium feeding chart. They have an aggressive and light feeding chart as well but since this is my first hydroponic cannabis grow I’ll play it safe, split the difference and use the medium feeding chart.
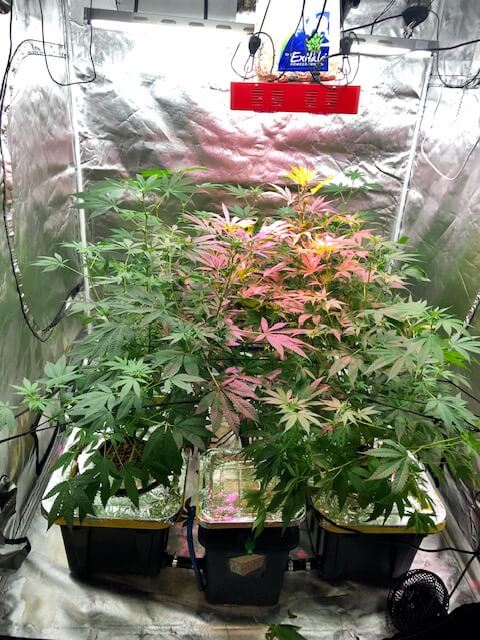
I’m also using Exhale Breath bags that is full of mushrooms that release CO2 out of a filter in the top of the bag. I will comment on how effective this CO2 bag is as the grow progresses because I will also be using a CO2 monitor to track this thing because I really want it to work. If it does work, it will be a cheap and effective method of delivering CO2 in grow tents. Some say it works, others say it did nothing. I will find out for myself.
The grow tent is a 5×5 with a 900 watt plant LED light along with 4 T5-HO Fluorescent bulbs for more spread and supplemental lighting. A fan with carbon filter is used as well as a small fan for air circulation within the tent.
I will update this page at least once a week all the way through harvest
pH Adjusting for Hydro
I’m just using regular tap water and I have to add pH down to every batch of nutrients to get the pH in the 5.5 to 6.5 range. I monitor this fairly regularly throughout the week.
Hydroponics Water Change Process
I completely drain the totes every week of the old nutrient water and add a fresh batch of water every week. I’ve found that using about 20 gallons of nutrient water to start the week is perfect and it allows me to go the whole week without having to add new nutrient/pH adjusted water to the totes mid-week. This allows a depth of about 4 inches of water in each tote at the beginning of the week.
Note: for the first several weeks of growth I used about 10 gallons of water in the totes to save money on nutrients. 20 gallons in the first several weeks of growth is too much water in my opinion and just wastes nutrients.
Weekly Nutrient Dosing Schedule
Week 1 – Start of Grow period
(18 hours of light per day, 6 hours darkness per day)
| Nutrients / Additives | ml/per gallon |
| FloraMicro | 2 |
| FloraGro | 2 |
| FloraBloom | 4 |
| CALiMAGic | 0 |
| Floralicious Plus | 0 |
| Liquid KoolBloom | 0 |
| Amor Si | 2 |
| Hydro Guard | 2 |
Week 2
| Nutrients / Additives | ml/per gallon |
| FloraMicro | 2 |
| FloraGro | 4 |
| FloraBloom | 5 |
| CALiMAGic | 2 |
| Floralicious Plus | 1 |
| Liquid KoolBloom | 0 |
| Amor Si | 2 |
| Hydro Guard | 2 |
Week 3
| Nutrients / Additives | ml/per gallon |
| FloraMicro | 4 |
| FloraGro | 5 |
| FloraBloom | 2 |
| CALiMAGic | 1 |
| Floralicious Plus | 1 |
| Liquid KoolBloom | 0 |
| Amor Si | 2 |
| Hydro Guard | 2 |
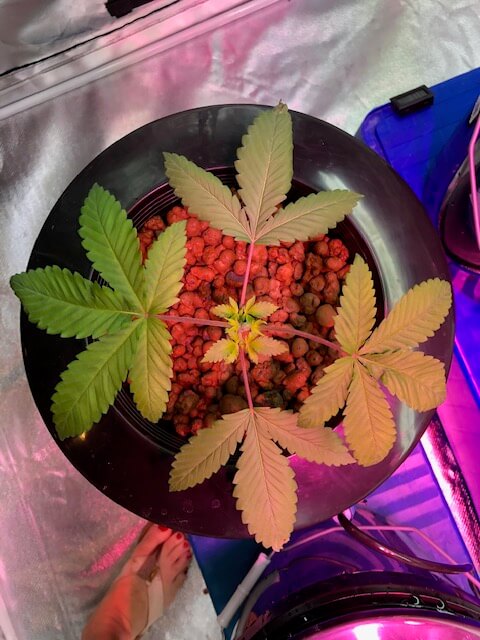
Week 4
| Nutrients / Additives | ml/per gallon |
| FloraMicro | 5 |
| FloraGro | 6 |
| FloraBloom | 3 |
| CALiMAGic | 1 |
| Floralicious Plus | 1 |
| Liquid KoolBloom | 0 |
| Amor Si | 2 |
| Hydro Guard | 2 |
I quad-lined the plants when they reached about 5 nodes. I kept nodes 2 and 3 and chopped nodes 1, 4, 5 and 6.
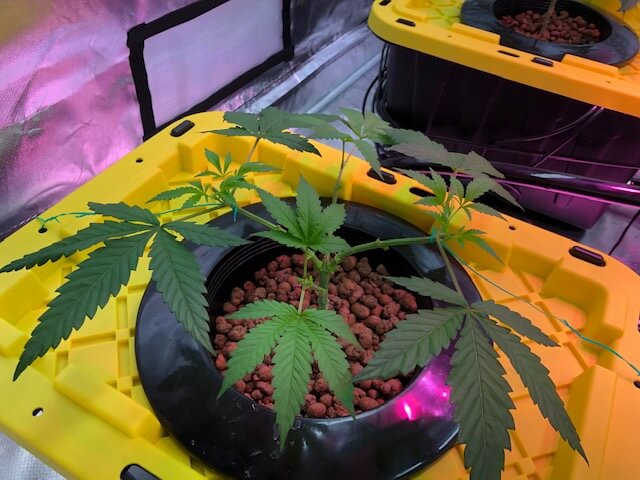
Week 5 – let the plants recover
| Nutrients / Additives | ml/per gallon |
| FloraMicro | 5 |
| FloraGro | 6 |
| FloraBloom | 3 |
| CALiMAGic | 1 |
| Floralicious Plus | 1 |
| Liquid KoolBloom | 0 |
| Amor Si | 2 |
| Hydro Guard | 2 |
Week 6 – start of Bloom phase
(12 hour on/off light cycle)
| Nutrients / Additives | ml/per gallon |
| FloraMicro | 4 |
| FloraGro | 3 |
| FloraBloom | 6 |
| CALiMAGic | 1 |
| Floralicious Plus | 1 |
| Liquid KoolBloom | 0 |
| Amor Si | 2 |
| Hydro Guard | 2 |
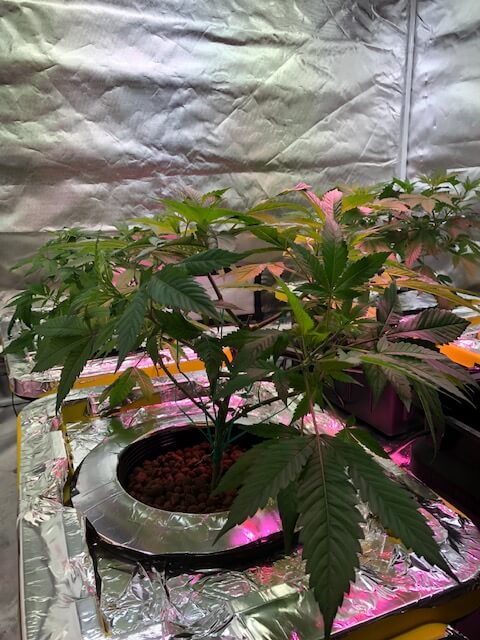
Week 7
| Nutrients / Additives | ml/per gallon |
| FloraMicro | 4 |
| FloraGro | 3 |
| FloraBloom | 6 |
| CALiMAGic | 1 |
| Floralicious Plus | 1 |
| Liquid KoolBloom | 1 |
| Amor Si | 2 |
| Hydro Guard | 2 |
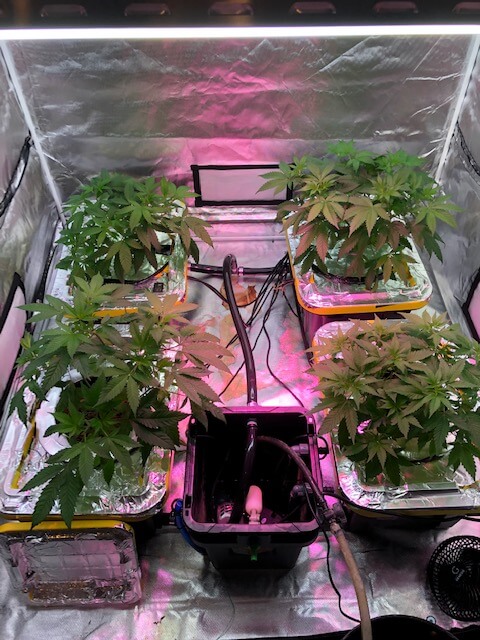
Week 8
| Nutrients / Additives | ml/per gallon |
| FloraMicro | 2 |
| FloraGro | 4 |
| FloraBloom | 6 |
| CALiMAGic | 1 |
| Floralicious Plus | 1 |
| Liquid KoolBloom | 1 |
| Amor Si | 2 |
| Hydro Guard | 2 |
Week 9
| Nutrients / Additives | ml/per gallon |
| FloraMicro | 2 |
| FloraGro | 4 |
| FloraBloom | 6 |
| CALiMAGic | 1 |
| Floralicious Plus | 1 |
| Liquid KoolBloom | 1 |
| Amor Si | 2 |
| Hydro Guard | 2 |
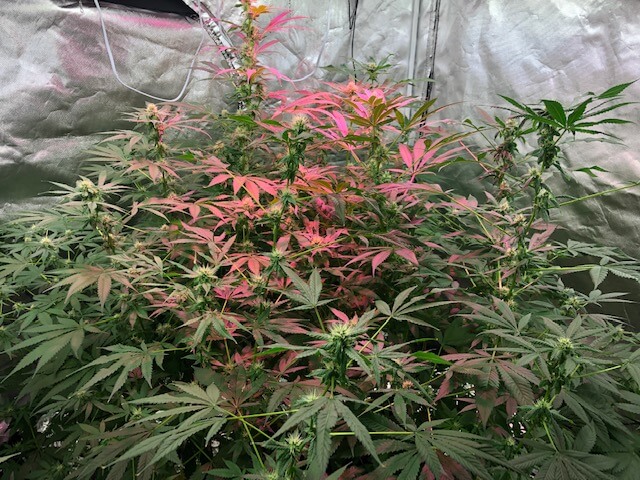
Week 10
| Nutrients / Additives | ml/per gallon |
| FloraMicro | 2 |
| FloraGro | 4 |
| FloraBloom | 6 |
| CALiMAGic | 1 |
| Floralicious Plus | 1 |
| Liquid KoolBloom | 2 |
| Amor Si | 2 |
| Hydro Guard | 2 |
Week 11
Went on vacation so I didn’t get any progress pictures.
| Nutrients / Additives | ml/per gallon |
| FloraMicro | 2 |
| FloraGro | 2 |
| FloraBloom | 2 |
| CALiMAGic | 1 |
| Floralicious Plus | 1 |
| Liquid KoolBloom | 2 |
| Amor Si | 2 |
| Hydro Guard | 2 |
Week 12
| Nutrients / Additives | ml/per gallon |
| FloraMicro | 2 |
| FloraGro | 2 |
| FloraBloom | 2 |
| CALiMAGic | 1 |
| Floralicious Plus | 1 |
| Liquid KoolBloom | 2 |
| Amor Si | 2 |
| Hydro Guard | 2 |

Week 13
| Nutrients / Additives | ml/per gallon |
| FloraMicro | 2 |
| FloraGro | 2 |
| FloraBloom | 4 |
| CALiMAGic | 0 |
| Floralicious Plus | 0 |
| Liquid KoolBloom | 0 |
| Amor Si | 2 |
| Hydro Guard | 2 |
| Ripen | 4 |
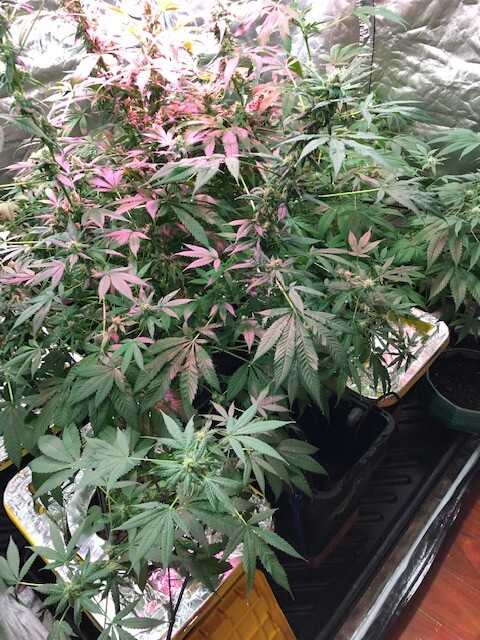
Week 14
| Nutrients / Additives | ml/per gallon |
| FloraMicro | 2 |
| FloraGro | 2 |
| FloraBloom | 4 |
| CALiMAGic | 0 |
| Floralicious Plus | 0 |
| Liquid KoolBloom | 0 |
| Amor Si | 2 |
| Hydro Guard | 2 |
| Ripen | 4 |
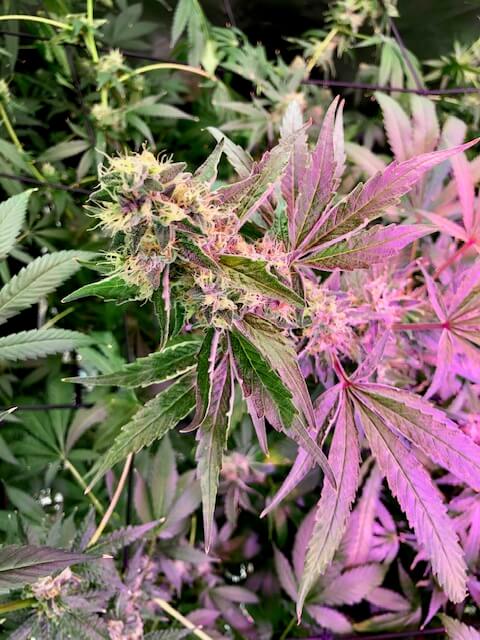
Week 15
| Nutrients / Additives | ml/per gallon |
| FloraMicro | 2 |
| FloraGro | 2 |
| FloraBloom | 4 |
| CALiMAGic | 0 |
| Floralicious Plus | 0 |
| Liquid KoolBloom | 0 |
| Amor Si | 0 |
| Hydro Guard | 2 |
| Ripen | 5 |
Week 16 – final Bloom phase
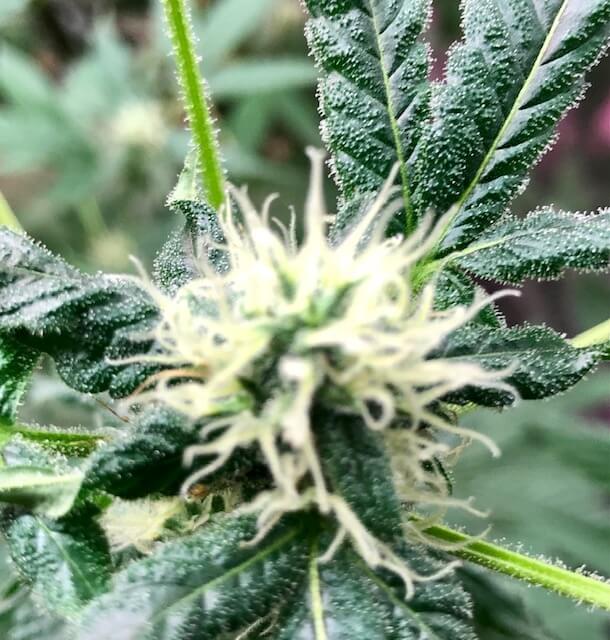
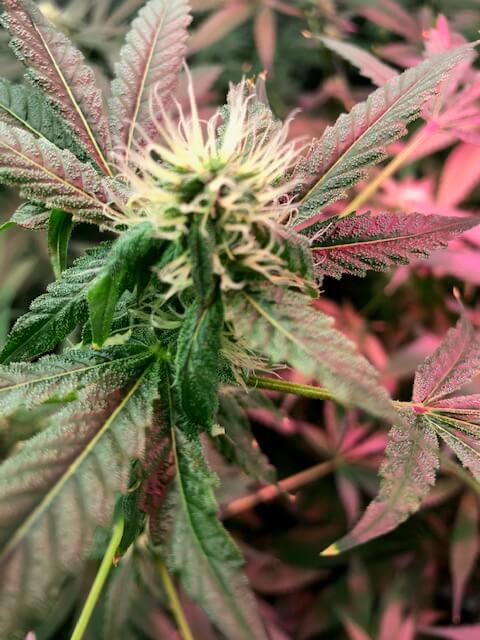
Going to go another week with these cannabis plants. Trichomes were not looking milky enough yet.
| Nutrients / Additives | ml/per gallon |
| FloraMicro | 2 |
| FloraGro | 2 |
| FloraBloom | 4 |
| CALiMAGic | 0 |
| Floralicious Plus | 0 |
| Liquid KoolBloom | 0 |
| Amor Si | 0 |
| Hydro Guard | 2 |
| Ripen | 5 |
Week 17 – Flushing the hydro system, doing a 2 day flush.
| Nutrients / Additives | ml/per gallon |
| FloraKleen | 10 |
Trimming, Drying and Curing
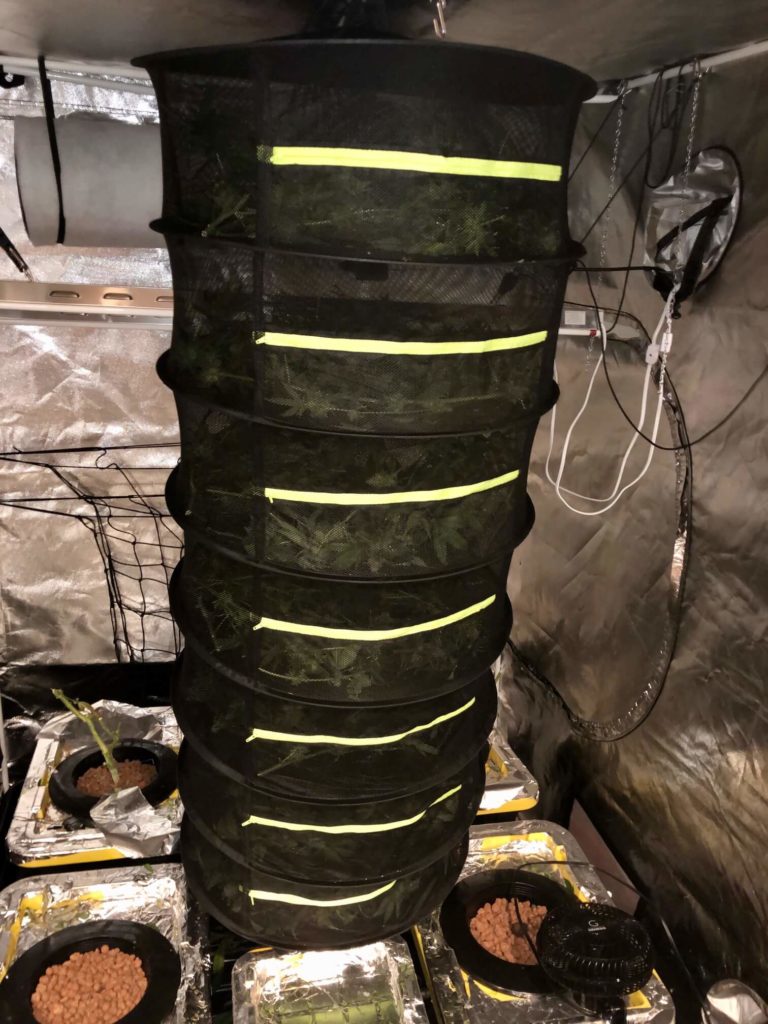
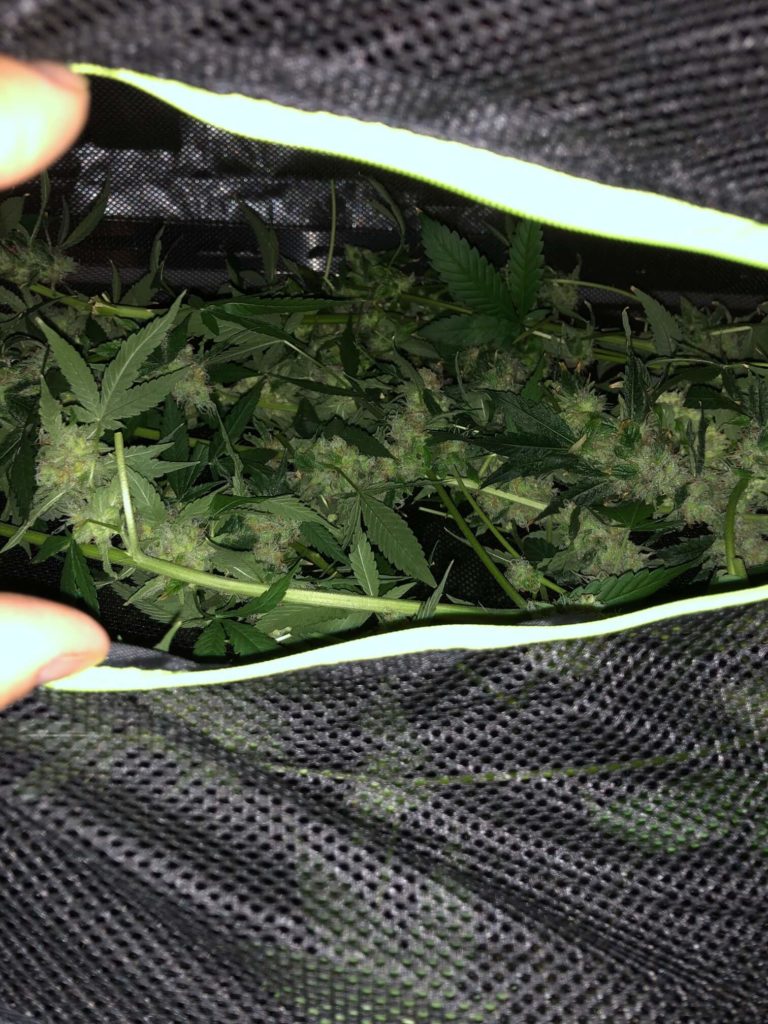
I used the grow tent (has 2 carbon filters) and this hangable drying rack with 8 drawers to dry the blue dream buds before trimming. Here is a close up view of the buds while drying:
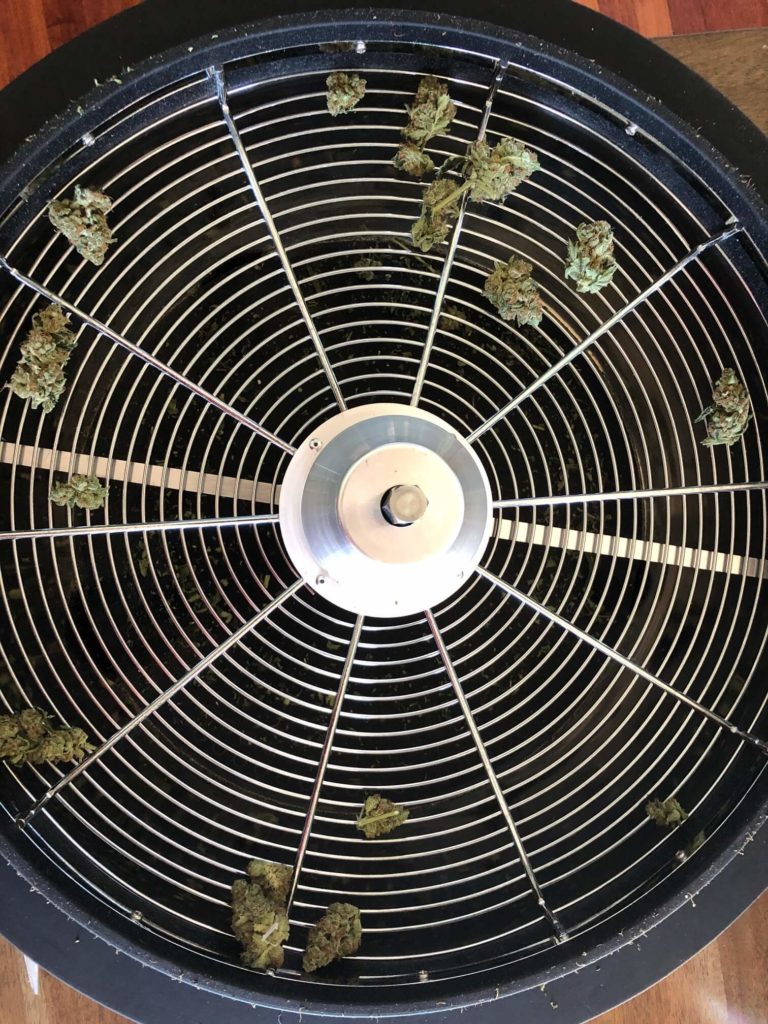
After about a week of drying in the grow tent, it was then time to use the trimmer bowl. This trimmer bowl makes short work of trimming and catches all the leftover sugar leaves and the tiny buds that you can then use to make edibles.
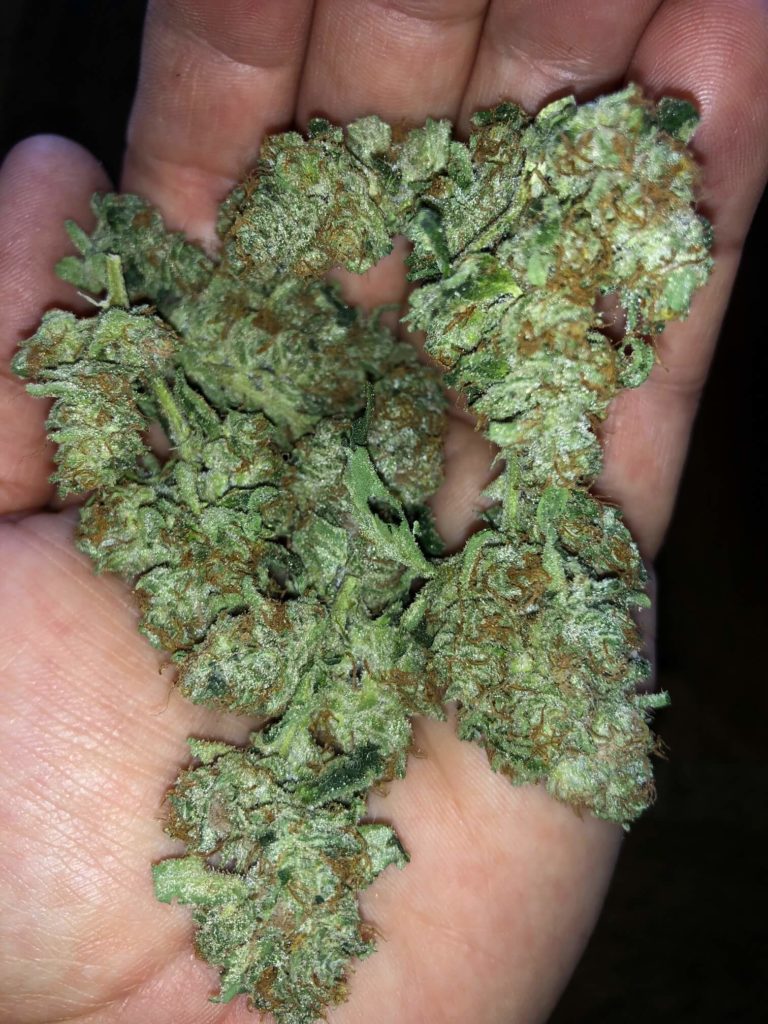
Here is how these Blue Dream buds looked after being ran through the trimmer bowl:
Blue Dream Total Final Yield
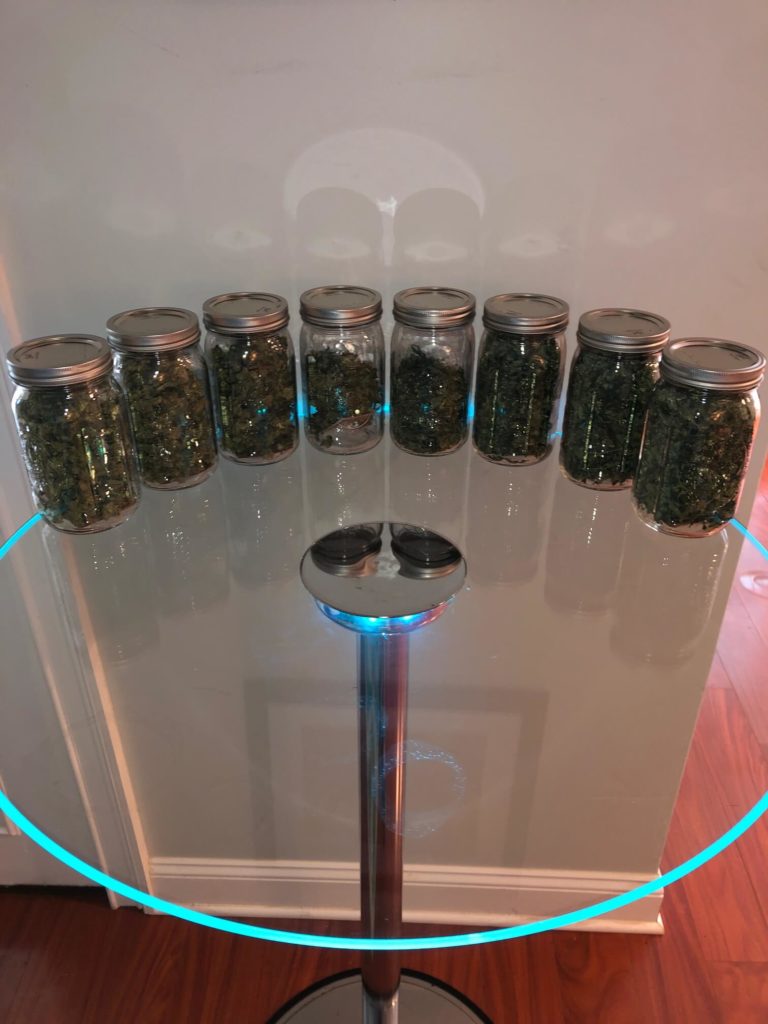
So the total yield turned out to be about 7.5 ounces, which was somewhat disappointing… I was expecting double that but given the stress I put the plants through with the original bubbler buckets in the beginning of this grow it doesn’t surprise me.
This was a fun grow. I learned a lot about this Blue Dream strain and now that the buds have had a chance to cure the flavor is amazing and the buzz is fantastic! This cannabis really gets your attention on the first inhale!
I also did a mini-experiment with this grow. I wanted to test for myself the flush vs. not flush ideologies. I took a large branch and dryed/cured it pre-flush and then flushed the system for around 2 days total for the rest of the plants. I can say that the flushed buds did taste better in my opinion.
Flushing is sort of a controversial subject and to our knowledge no conclusive scientific studies have been done to show the benefits of flushing. I plan on doing the 2 or 3 day flush going forward.
Blue Dream Grow Lessons Learned
- The original bubbler buckets that I started the grow with did not provide enough dissolved oxygen and started leading to root rot.
- Quad-lining didn’t work out so well…. I eventually chopped the 2 of the nodes on each plant due to them looking not so great. Not sure if I picked the wrong nodes or what… Next grow I plan on just main-lining to have two main nodes instead of four.
- T5 lights worked great (along with the 900 watt LED light) for supplemental lighting and they provide a lot of spread to help reach the lower buds on the plant.
- I may have started the final bloom phase too quickly. Next time I plan on letting it go another week or two.
- Elevate the totes off the ground slightly. When I had the totes directly on the tent floor I was getting condensation developing on the tent floor which leaked onto the main flooring underneath the tent. Not a super big deal but easily preventable.
- Sure seems like the Exhale Breath bag with CO2 worked. I was monitoring the CO2 levels in the tent and they did go up somewhat, maybe around 400ppm. I placed it on one side of the tent and those two plants definitely seemed stronger with thicker branches. Might get a second bag to hang in the tent for the next grow and place it on the other side. I would like to see the CO2 levels be around at least 1,200 ppm in the tent to get better growth out of the plants.
- I’m going to add a second 1500 watt LED light to the tent for the next grow to get more lights over the plants.
- Get the SCROG net(s) up early when growing blue dream. These plants stretched quickly and since they are sativa they get pretty tall. I had a couple branches bend over due to the weight of the buds and having the second SCROG net up earlier would have helped that situation.
Well, that’s a wrap with this Blue Dream grow log. Next up in the tent is going to be Candyland and Sour Diesel and I’m hoping for much bigger yields with this next grow.
A cannabis aficionado… I’ve always been interested in cannabis and enjoy sharing my trials and tribulations with others so they can learn from my mistakes! I prefer sativa and hybrid strains over indica strains.